The cSlope window
The parts of the main window, the ribbon menus, the canvas modes and the dialog windows.
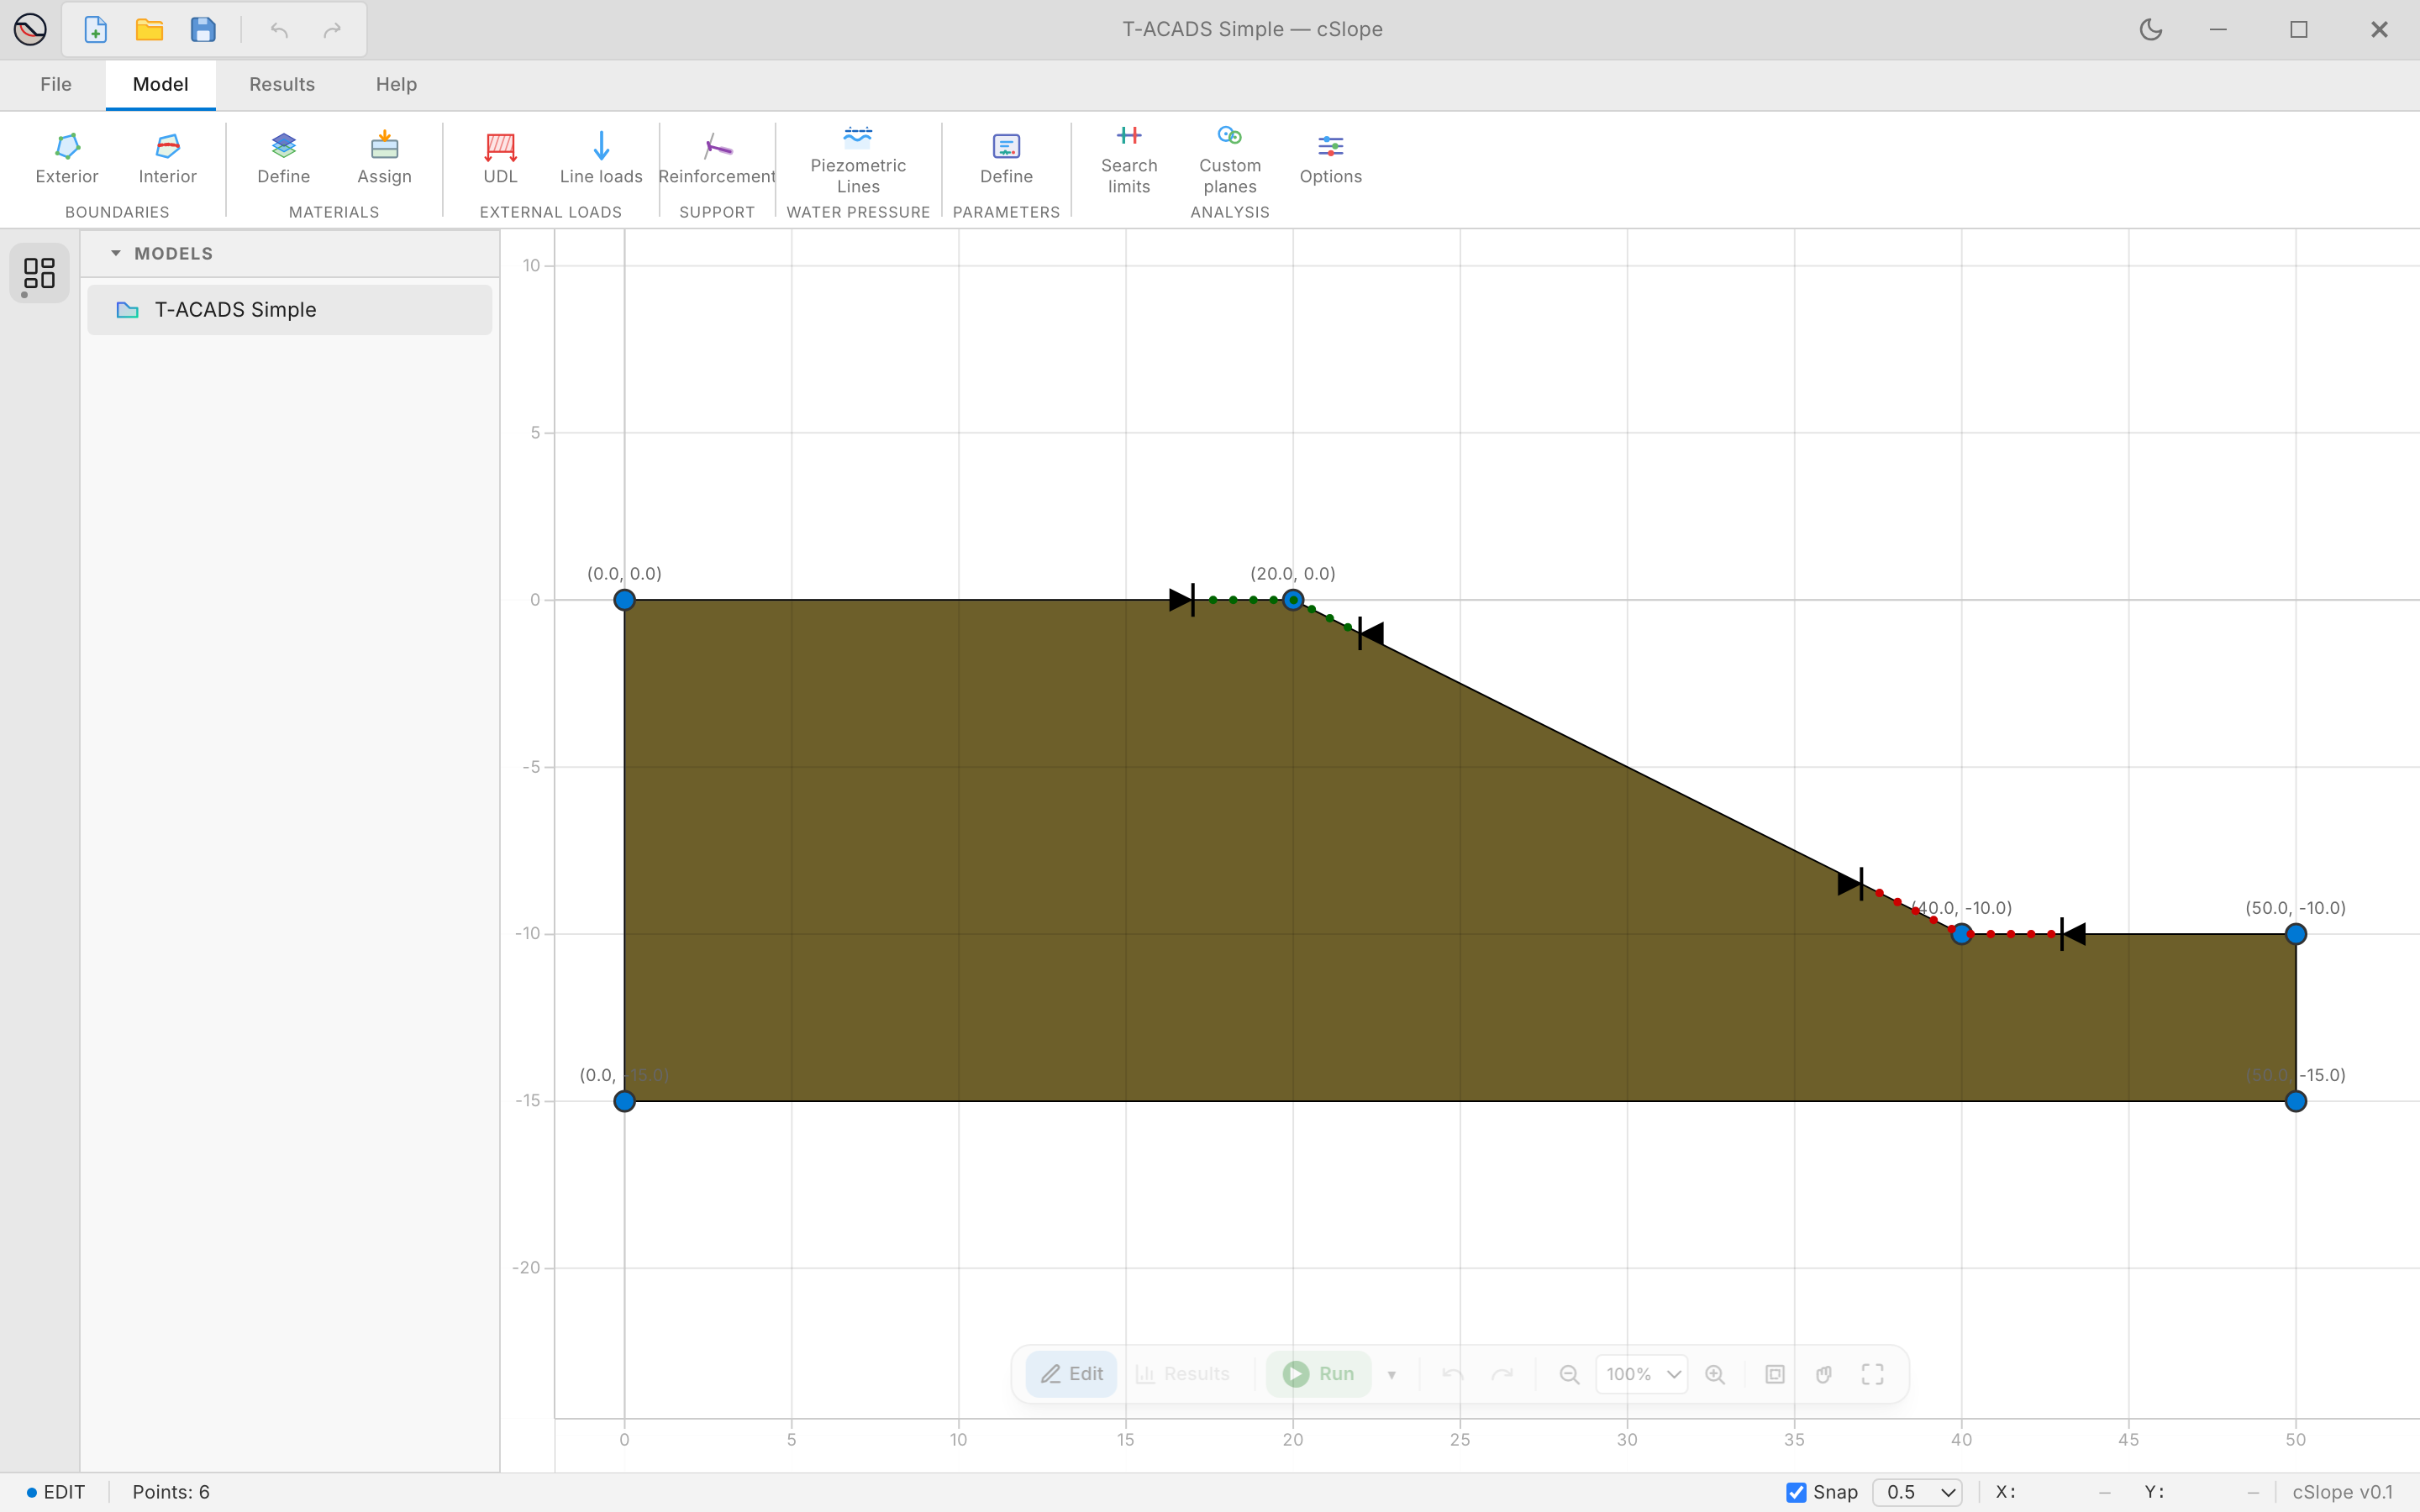
Layout
From top to bottom, the main window has:
- Title bar: buttons for New project, Open project and Save, then Undo and Redo. The centre shows the name of the active model. On the right are the theme switch (light or dark) and the window buttons.
- Ribbon: the tabs File, Model, Results and Help. Each tab shows a row of buttons below it.
- Canvas: the model, in edit mode or result mode, with a floating toolbar.
- Status bar: the mode, the number of boundary points, the factor of safety of the last analysis, the snap settings and the cursor coordinates.
A narrow strip on the far left toggles the Explorer (the list of models). In result mode it also toggles the result sidebar. Right-click either button to move that panel to the other side of the window. Drag a panel's edge to resize it.
The ribbon
| Tab | Buttons |
|---|---|
| File | New, Open, Import DXF, Save, Save As, Exit |
| Model | Boundaries (Exterior, Interior), Materials (Define, Assign), External loads (UDL, Line loads), Support (Reinforcement), Water Pressure (Piezometric Lines), Parameters (Define), Analysis (Search limits, Custom planes, Options) |
| Results | Plots (Results Plot, Sensitivity, Probabilistic), Display, Annotations, Templates, Export |
| Help | Benchmarks, About |
Hover over a button to see its shortcut, if it has one.
Dialog windows
Each button on the Model tab opens its own window. The windows are not modal: they stay open next to the main window, and a change in a window shows on the canvas at once (and the other way round). Clicking the button of a window that is already open brings it to the front. Esc closes a window when no field has focus.
Opening a window also chooses what you can edit on the canvas. With Exterior open you drag the points of the exterior boundary; with Piezometric Lines open you drag the points of the water lines, and so on.
Edit mode and result mode
The canvas has two modes, switched with Edit and Results on the floating toolbar:
- Edit mode shows the model with its boundaries, materials, water lines, loads, reinforcement and search limits. This is where you build and change the model.
- Result mode shows a print sheet with the analysed model, the critical slip surface and the annotations. It becomes available after an analysis. See Results.
▶ Run on the floating toolbar runs the analysis of the active model and switches to result mode. See Running the analysis.
The floating toolbar
The toolbar on the canvas holds the mode buttons, ▶ Run (with Run all, Reset and Reset all in its menu), Undo and Redo, and the zoom tools: Zoom out, a zoom percentage, Zoom in, Zoom box, Pan and Fit to screen. It fades when the pointer is not over it.
Models and projects
A project holds one or more models, listed in the Explorer under Models. Each model is a complete analysis with its own geometry, materials, options and result.
- Click a model to make it active. A model that has a result opens in result mode.
- Double-click a model to rename it.
- Drag models to reorder them.
- Ctrl+click or Shift+click to select several models; right-click them for Delete Selected.
- Right-click for Properties, Rename, Duplicate and Delete.
Duplicate is the way to try a variant of a model, for example with a different water level, and compare the results. File › Import DXF also adds a model.
Properties opens the project information of the model: title, subtitle, client, project number, revision, date, author, checker and notes. Text annotations on the result sheet can show these fields (see Reporting).
Undo and redo
Ctrl+Z undoes the last change, Ctrl+Shift+Z or Ctrl+Y redoes it. There is one history, of the last 50 changes to the active model. Dragging a point counts as one change. The history is cleared when you switch models or open a project.
Units
cSlope works in SI units only: metres, kN, kPa, kN/m³ and degrees. Forces are per metre run of the slope unless stated otherwise.