Reinforcing a slope with soil nails
Add soil nails to a slope, see the force each one carries, and how much they raise the factor of safety.
The slope from Your first analysis has a factor of safety of 0.984. This tutorial reinforces it with three rows of soil nails.
1. Add the nails
Start a new project with File › New. Open Model › Support › Reinforcement, choose Soil nail in the list below the reinforcement table and click + Add, three times.
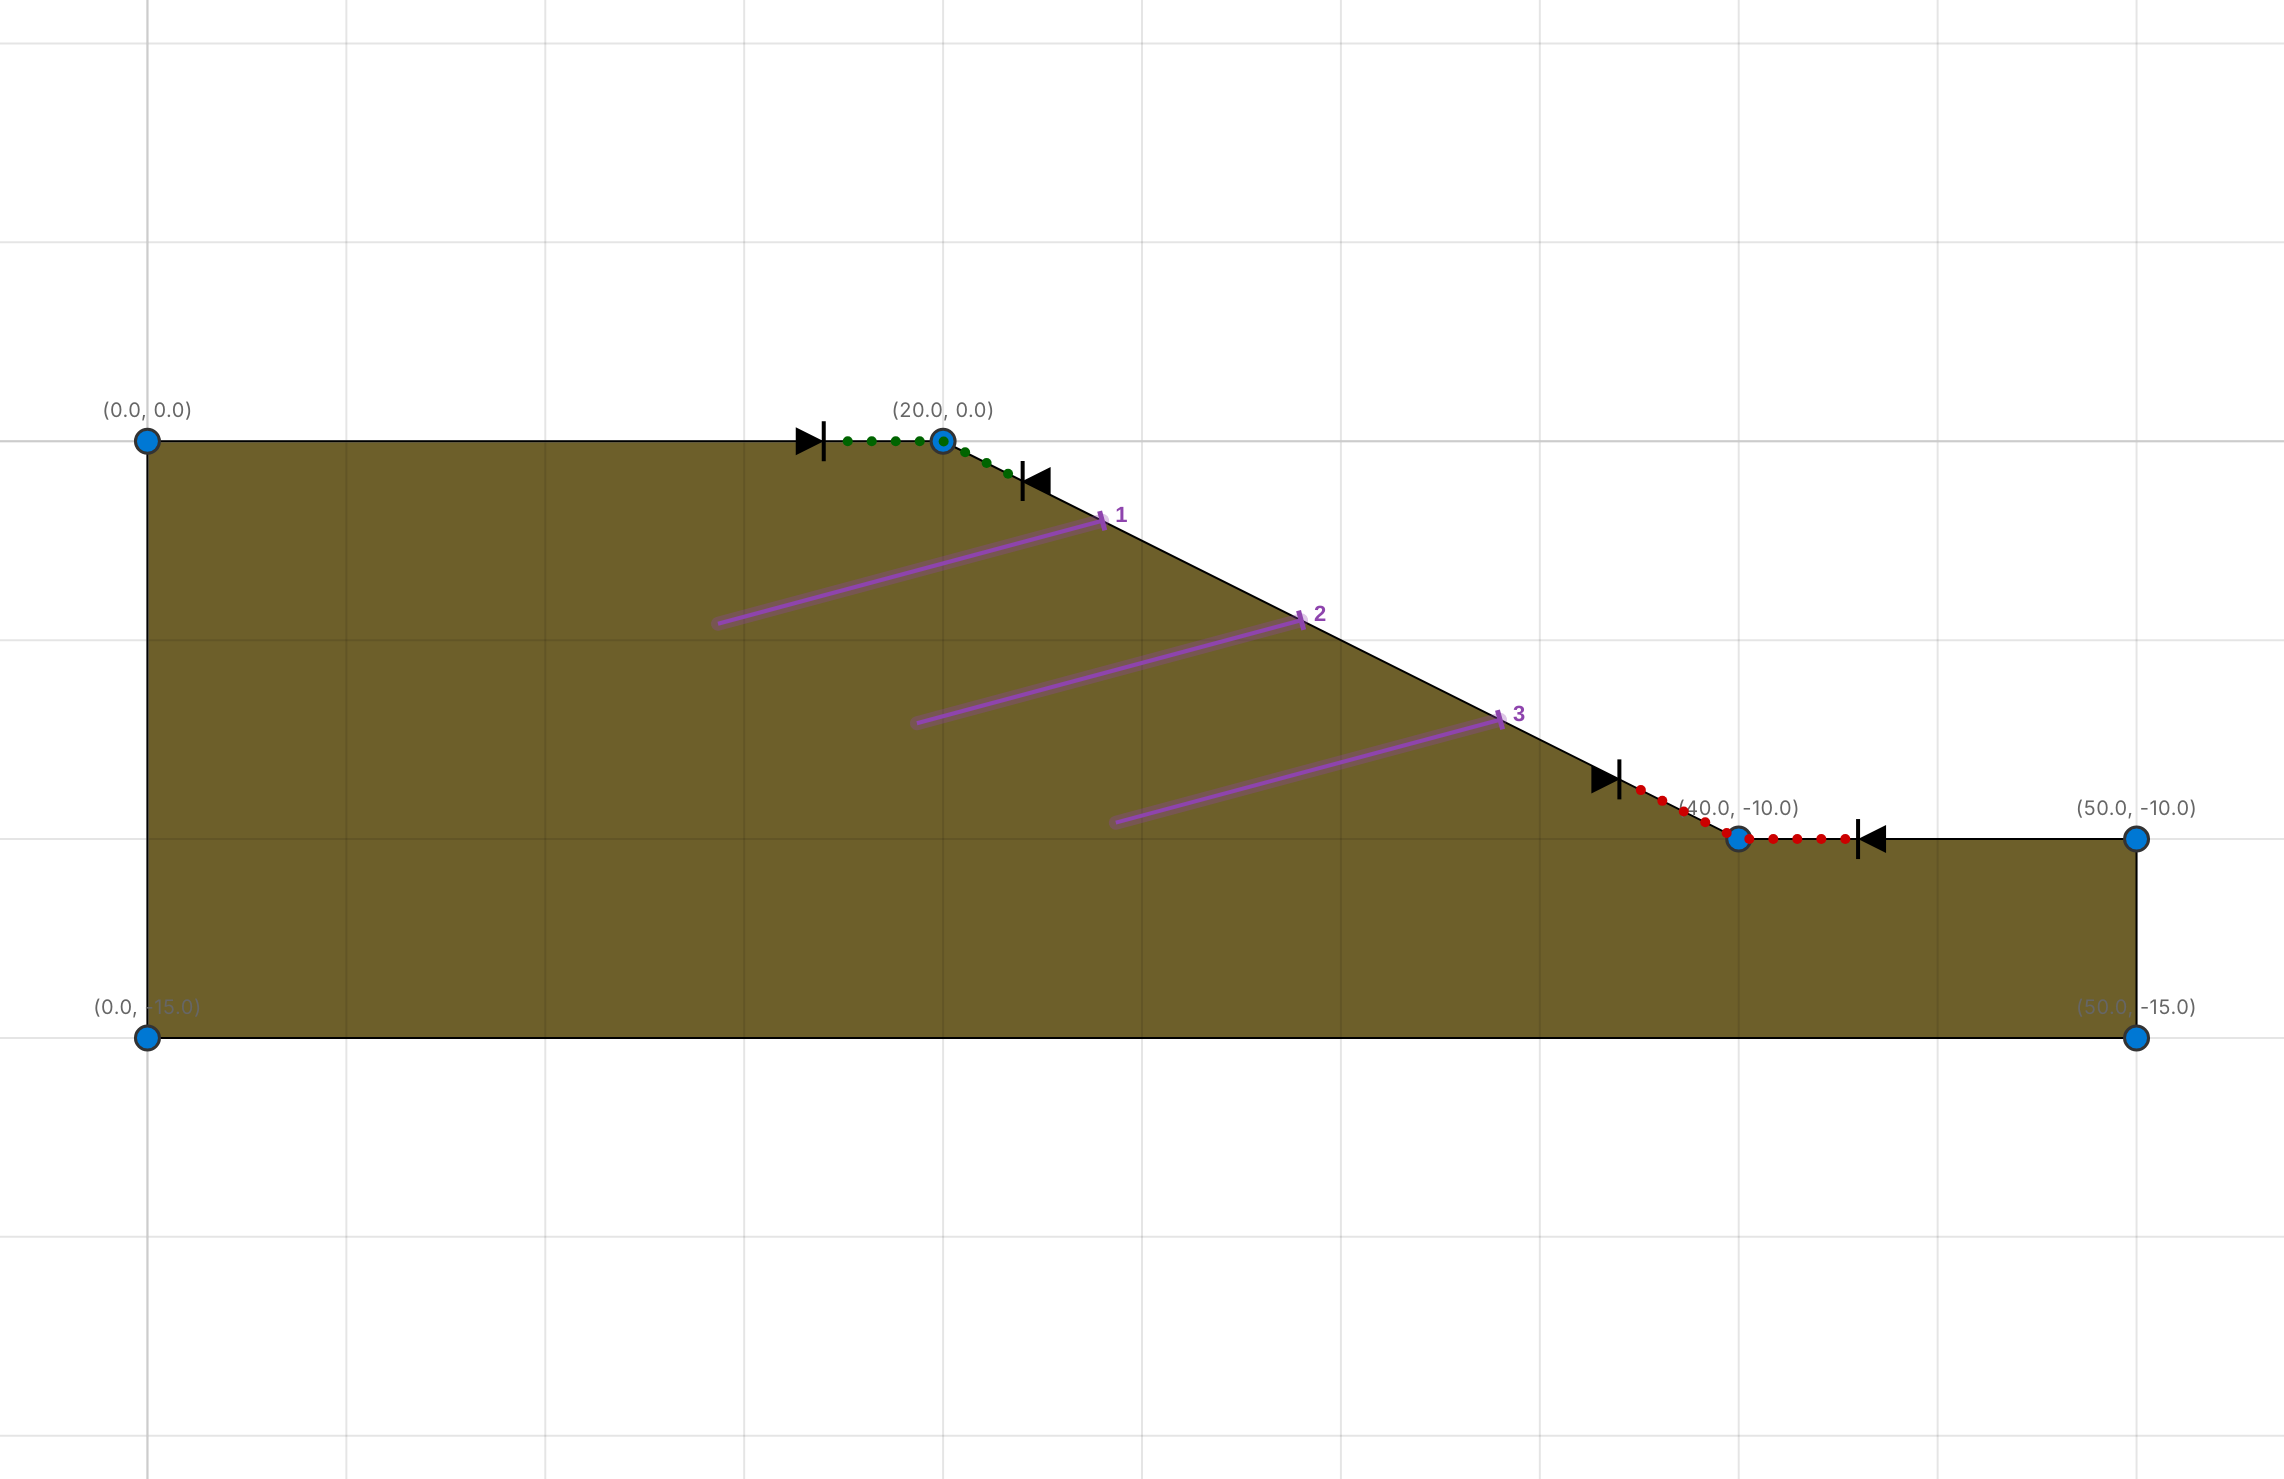
Each nail runs from end 1, the head at the face, to end 2, the embedded end. Enter these coordinates (10 m long nails inclined 15° below the horizontal):
| # | x1 | y1 | x2 | y2 |
|---|---|---|---|---|
| 1 | 24 | −2 | 14.341 | −4.588 |
| 2 | 29 | −4.5 | 19.341 | −7.088 |
| 3 | 34 | −7 | 24.341 | −9.588 |
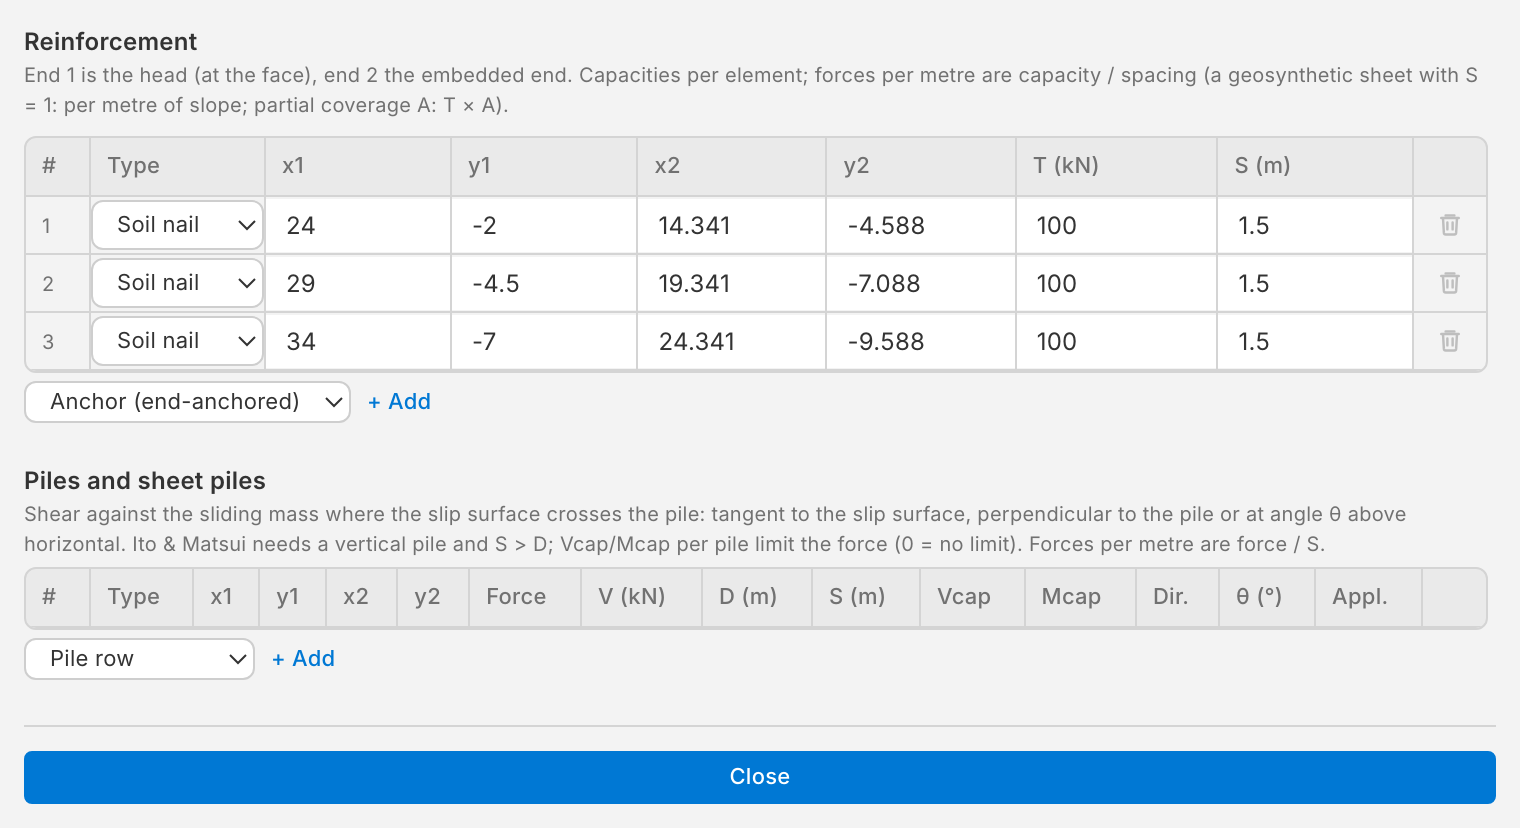
A soil nail starts with a tensile capacity T of 100 kN, an out-of-plane spacing S of 1.5 m, a bond strength of 15 kN/m along its whole length and a 50 kN plate at the head. It is passive: its force is mobilised together with the soil and divided by the factor of safety. Click a row to see and change these properties.
2. Run
Click ▶ Run.
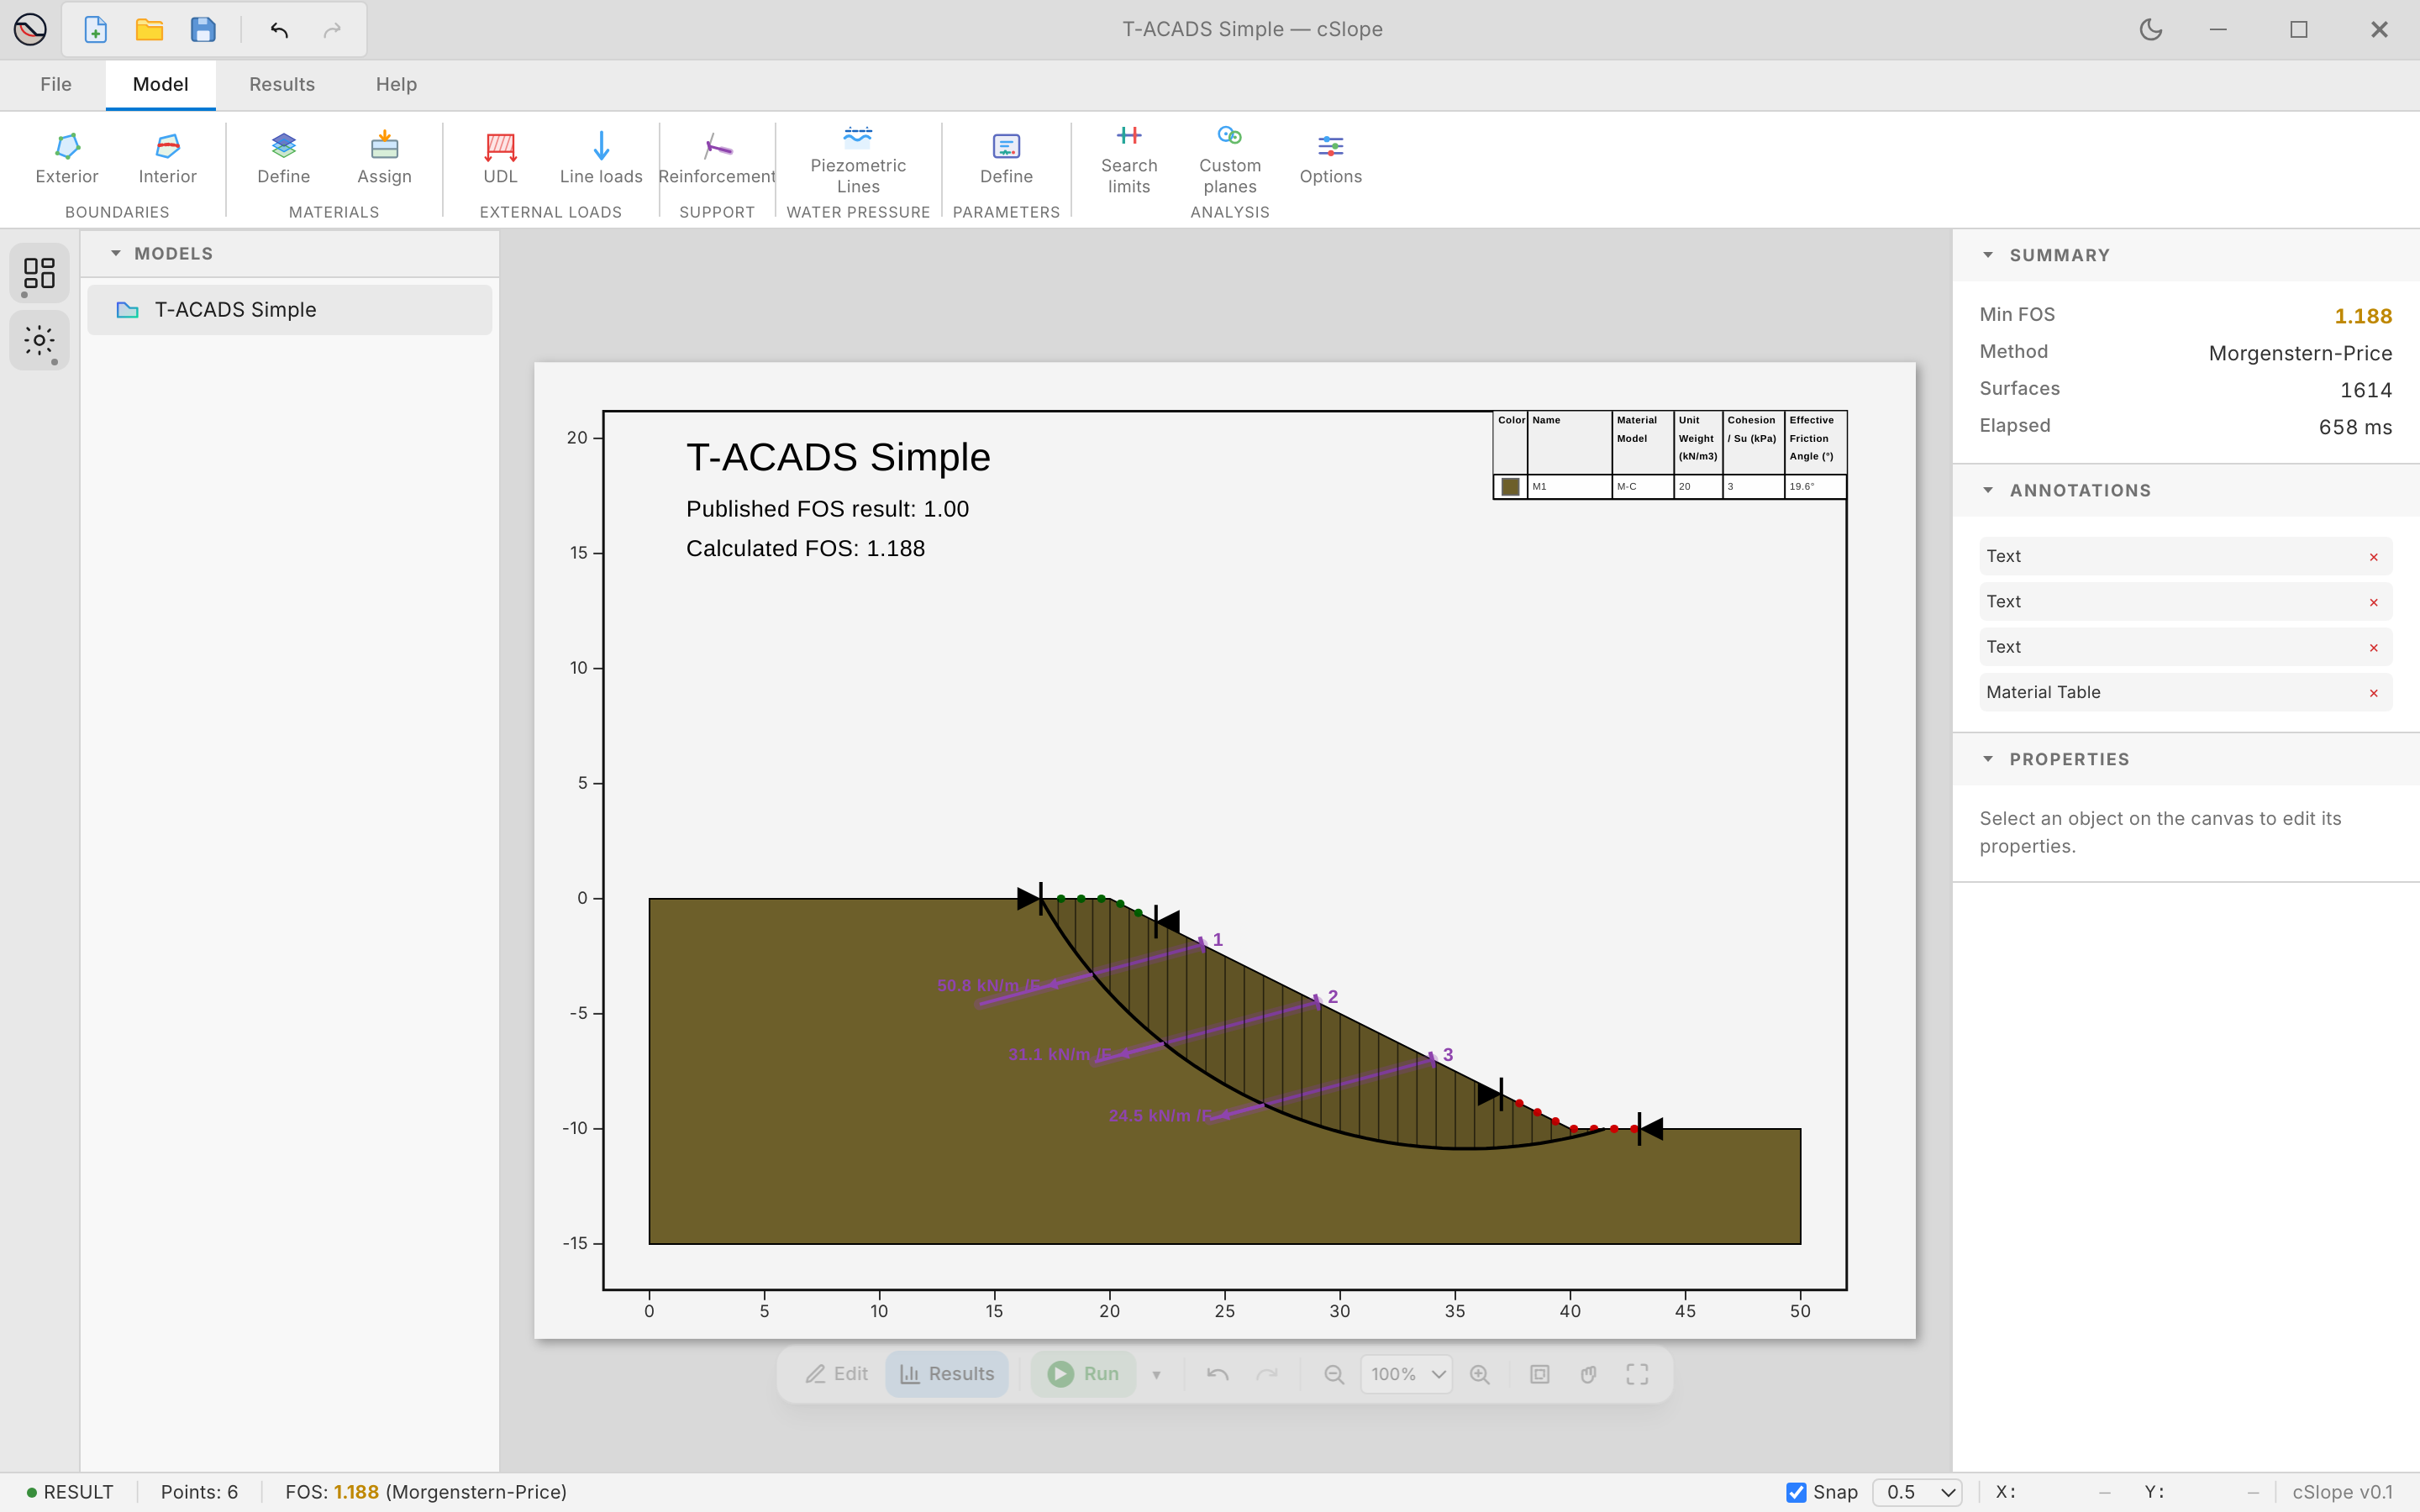
Where the critical surface crosses a nail, the force is the smallest of the tensile capacity, the pullout resistance on the head side (bond plus the plate) and the pullout resistance on the embedded side (bond), divided by the spacing. The upper nail, with the longest anchorage behind the surface, carries the most.
3. Try it
- Reduce the spacing to 1 m: more nails per metre, a higher factor of safety.
- Change the nails to Active: their force is no longer divided by the factor of safety, as for prestressed anchors.
- Lengthen the lowest nail, and see whether its force grows.
More in Reinforcement and piles.